ONLINE STUDY MATERIAL & INSTALLATION GUIDE - Created by Jayendra Chauhan

Tuesday, August 6, 2013

Installation Guide of ClearOS 6.3.0

Installation Of ClearOS 6.3.0 With Screenshots

Click Here Download 
http://www.clearfoundation.com/Software/downloads.html

Boot the Computer with ClearOS 6.3.0 Installation CD/DVD or ISO.
1. Select Install or upgrade ClearOS 6.3.0
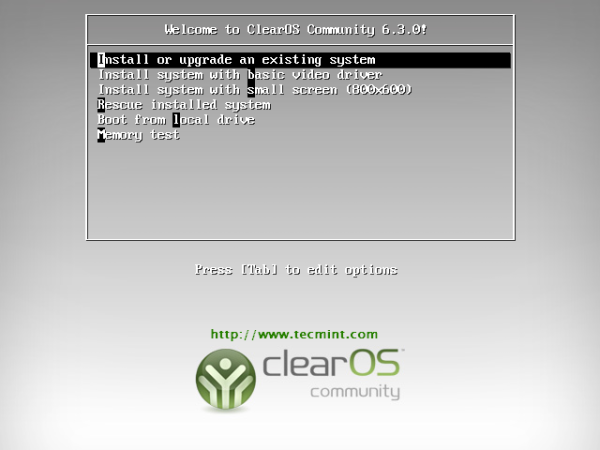
ClearOS 6.3 Install
ClearOS 6.3 Install or Upgrade
2. Welcome screen of ClearOS 6.3.0
ClearOS 6.3 Welcome
ClearOS 6.3 Welcome Screen
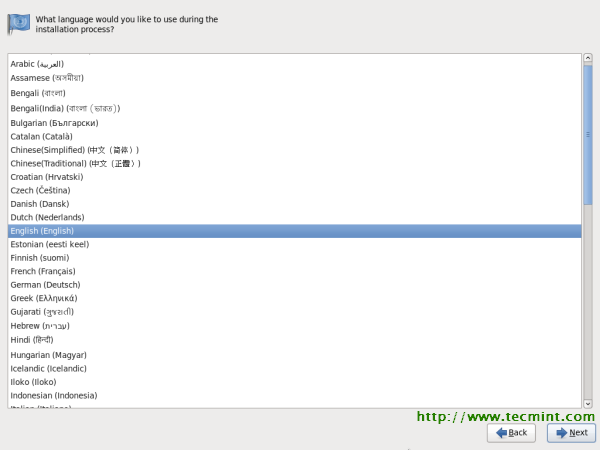
3. Language selection.
ClearOS 6.3 Language
ClearOS 6.3 Language Selection
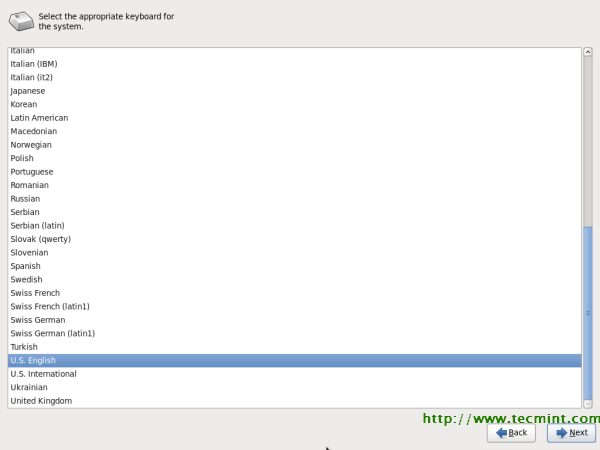
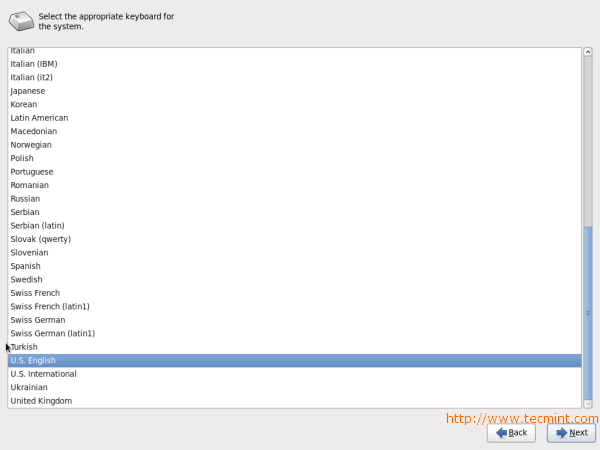
4. Keyboard selection.
ClearOS 6.3 Keyboard
ClearOS 6.3 Keyboard Selection
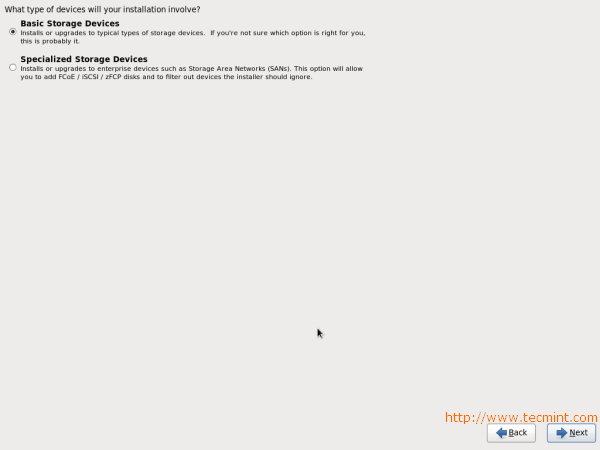
5. Select Basic Storage device, if your hard drive is locally attached.
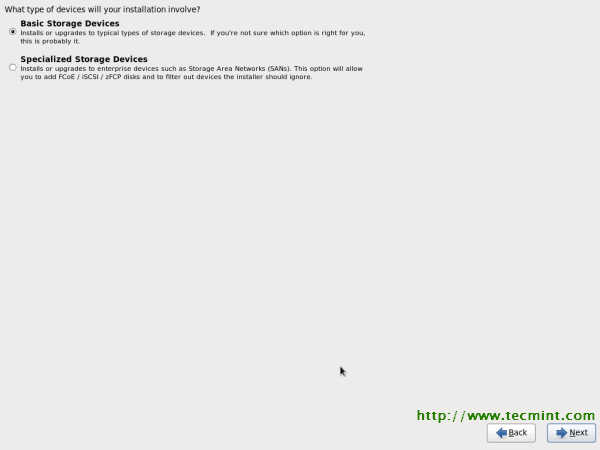
ClearOS 6.3 Basic Storage
ClearOS 6.3 Basic Storage Selection
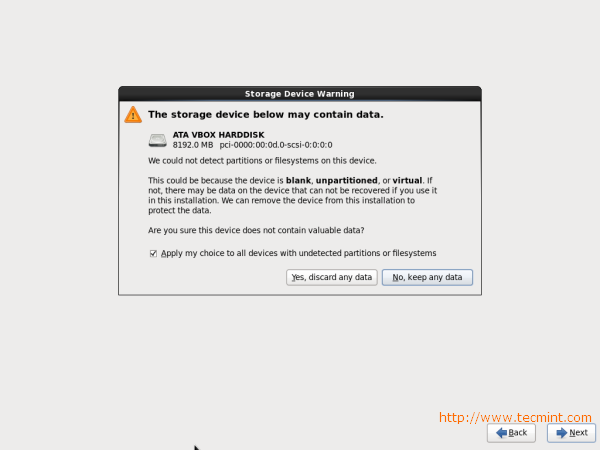
6. Storage Device Warning, Click yes, discard any data.
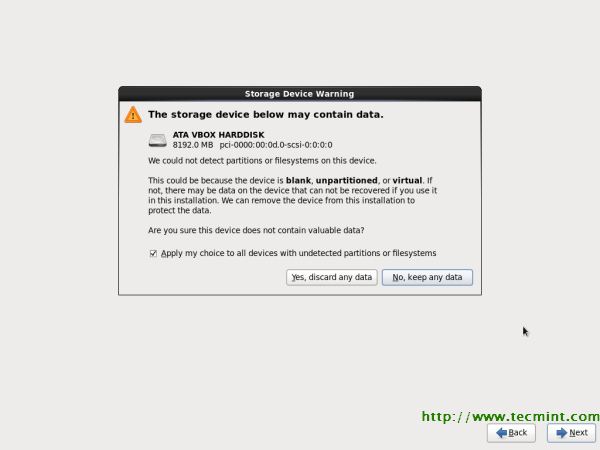
ClearOS 6.3 Device Warnings
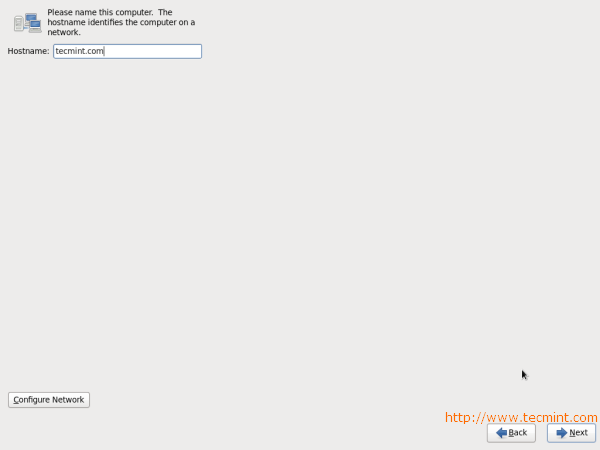
7. Give a Name to your system. You may Click on Configure Network button if you want to configure Network during installation.
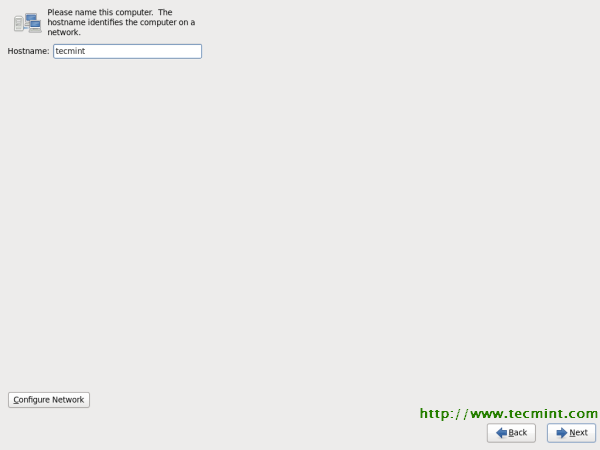
ClearOS 6.3 Hostname Add
ClearOS 6.3 Hostname Setup
Note: Click Wired tab and click on add button. Select Connect automatically, go to ipv4 settings tab and select Method and select Manual in drop down. Fill address box with IP Address, Netmask & Gateway. In this howto’s I’m using IP Address 192.168.50.20 for this system. The IP Address may differ in your environment.
8. Select nearest city in your time zone.
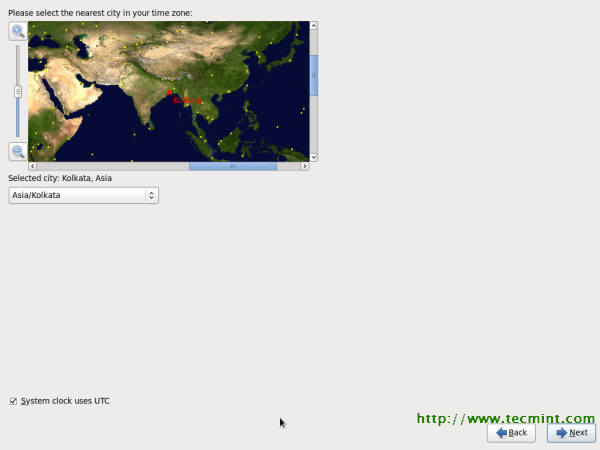
ClearOS 6.3 Add City
ClearOS 6.3 Time Zone Selection
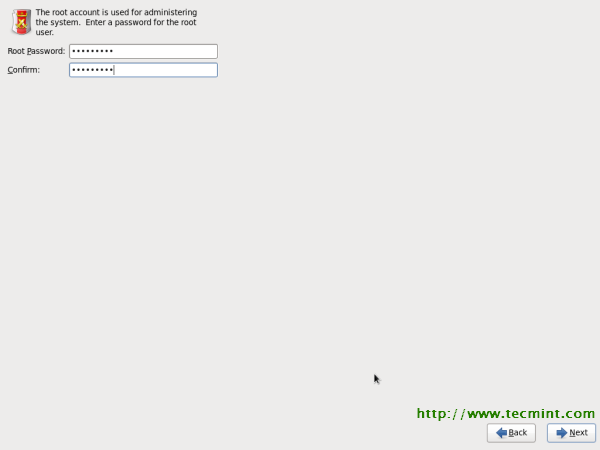
9. Enter root password.
ClearOS 6.3 root password
ClearOS 6.3 Set Root Password
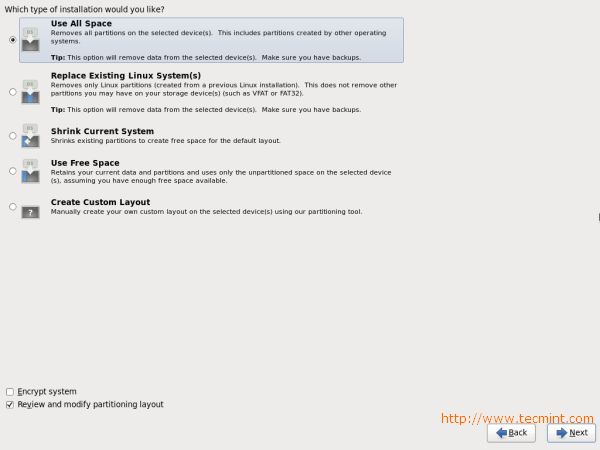
10. Select Partition types as per your need.
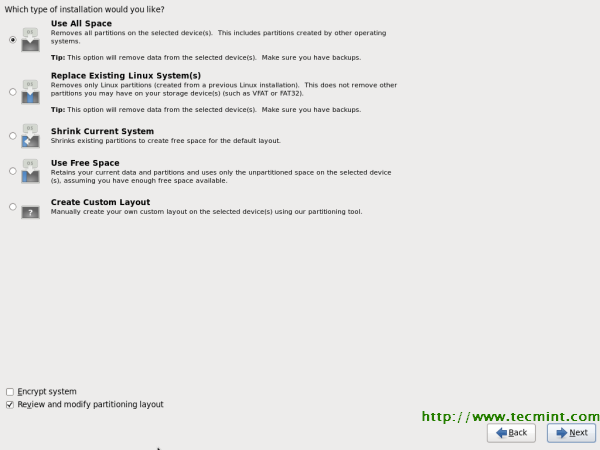
ClearOS 6.3 Partition
ClearOS 6.3 Partition Selection
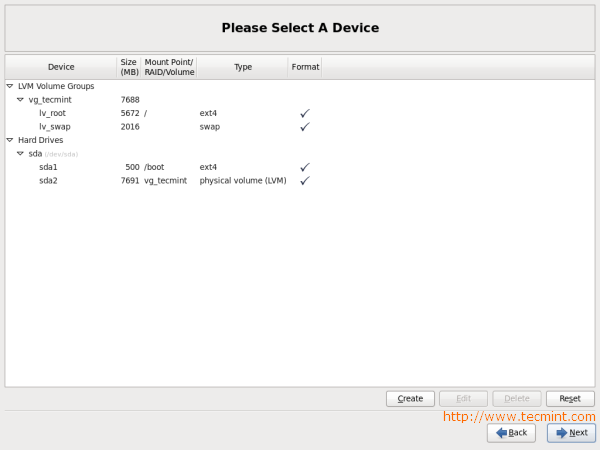
11. Verify Partitions or you can edit filesystem partition If you like.
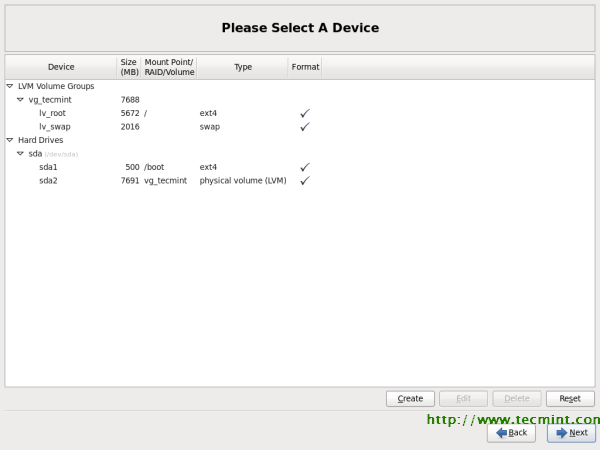
ClearOS 6.3 Verify Partition
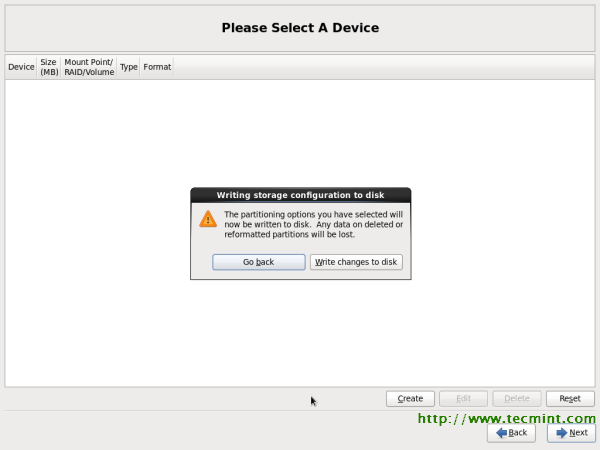
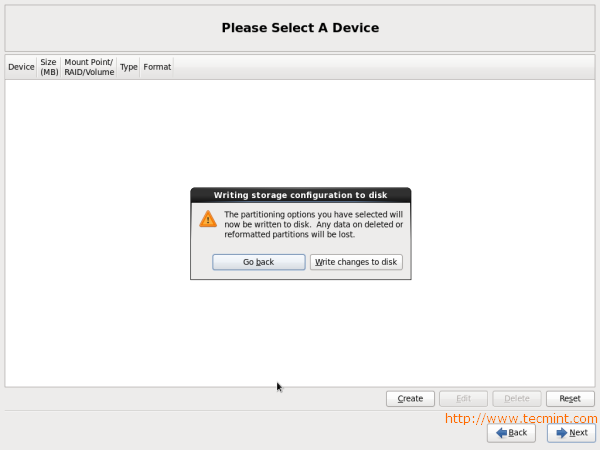
12. Select Write changes to Disk.
ClearOS 6.3 Disk Changes
ClearOS 6.3 Disk Write Changes
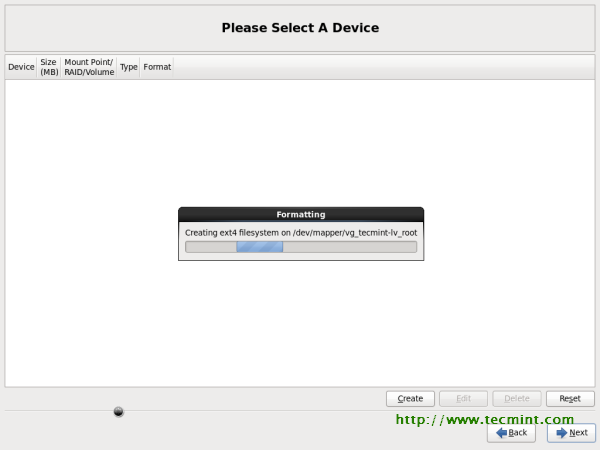
13. Filesystem formatting.
ClearOS 6.3 Formatting
ClearOS 6.3 File System Formatting
14. Bootloader options. You can give bootloader password to enhance security.
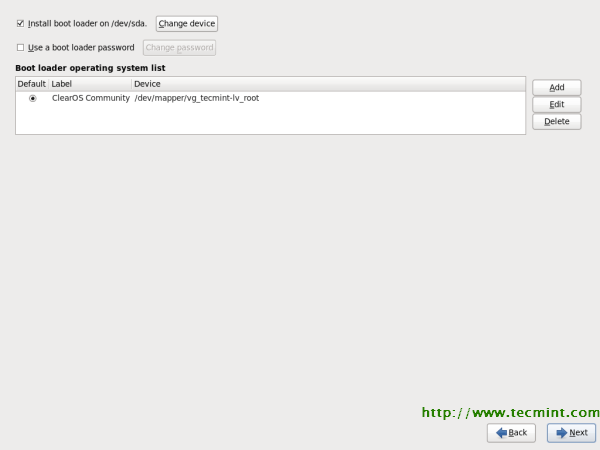
ClearOS 6.3 Boot Loader
ClearOS 6.3 Boot Loader Selection
15. Installation started, this may take several minutes.
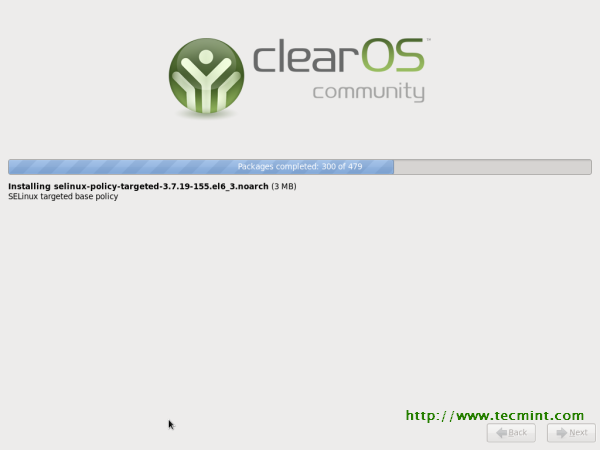
ClearOS 6.3 Installation
ClearOS 6.3 Installation Started
16. Installation completed, Please remove CD/DVD and reboot system.
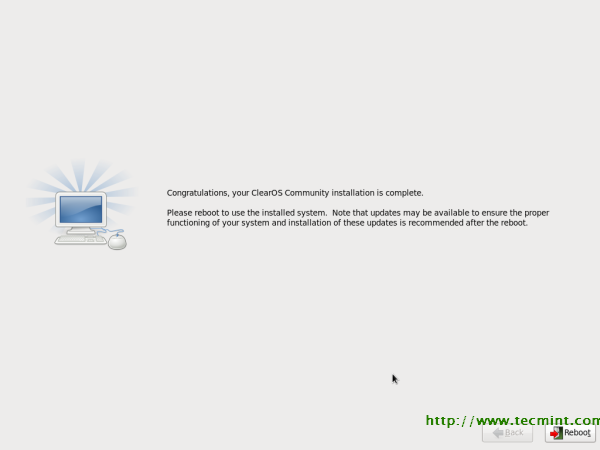
ClearOS 6.3 Installation Completes
17. After reboot, First screen of Clear OS.

ClearOS 6.3 Reboot
ClearOS 6.3 Reboot Screen
18. Post installation, you will get below screen where we can use browser to configureClearOS 6.3.0 using URL to connect web interface (https://192.168.50.20:81).
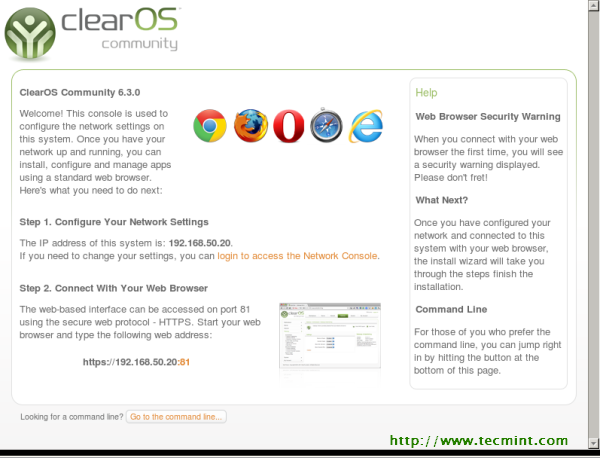
ClearOS 6.3 Post Installation
ClearOS 6.3 Post Installation Screen
19. Open ClearOS Web Interface in a browser with root user and password for initial configuration.
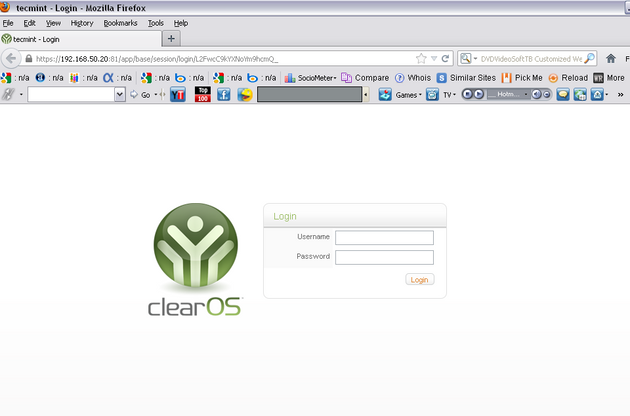
ClearOS Web Interface
ClearOS 6.3 Web Interface
20. Installation Wizard will come up and follow the instructions as it says.
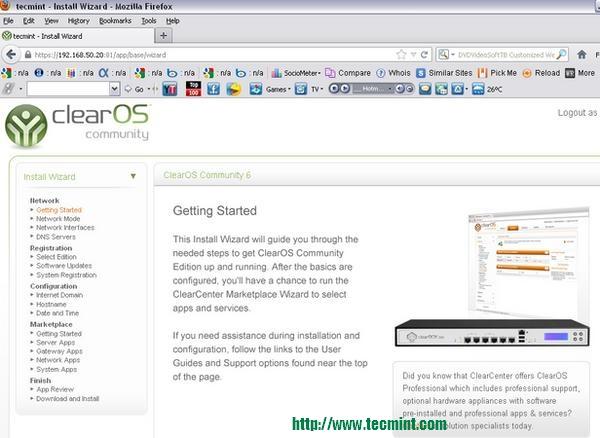
ClearOS Installation Wizard
ClearOS 6.3 Installation Wizard
21. Select modes, Private Server Mode (for local network) is appropriate for this scenario (Without firewall)
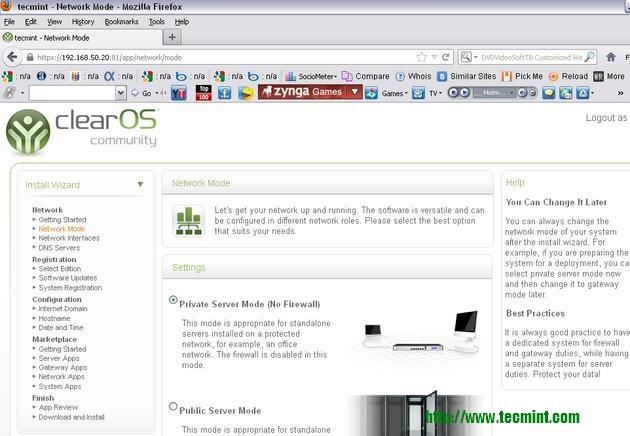
ClearOS Select Modes
ClearOS 6.3 Select Modes
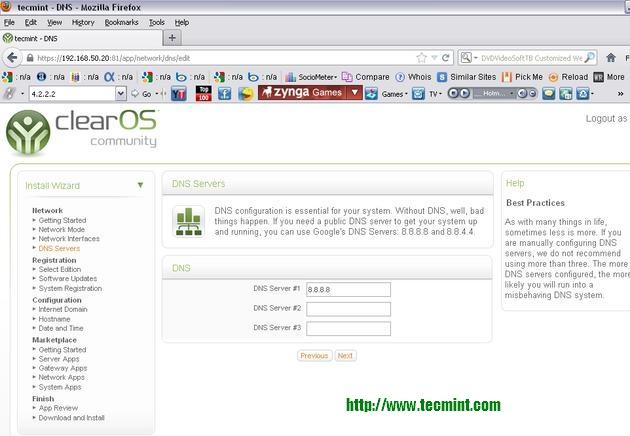
22. Next two steps is for Network Setting, you can edit Network Settings here if you want.
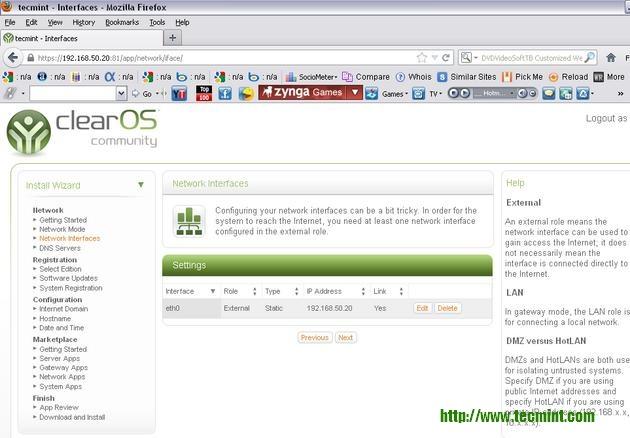
ClearOS Network Settings
ClearOS 6.3 Network Settings
ClearOS Network Configuration
ClearOS 6.3 Network Configuration
23. Select ClearOS Community Edition or ClearOS Professional. Visit ClearOS Websiteto know more about differences.
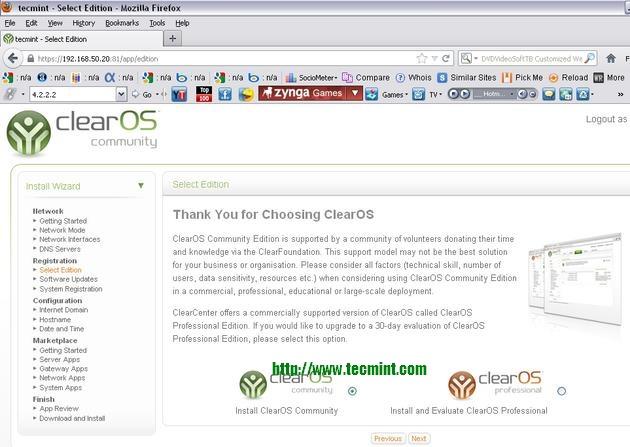
ClearOS Community Edition
Select ClearOS 6.3 Community Edition
24. Next step for software updates if any
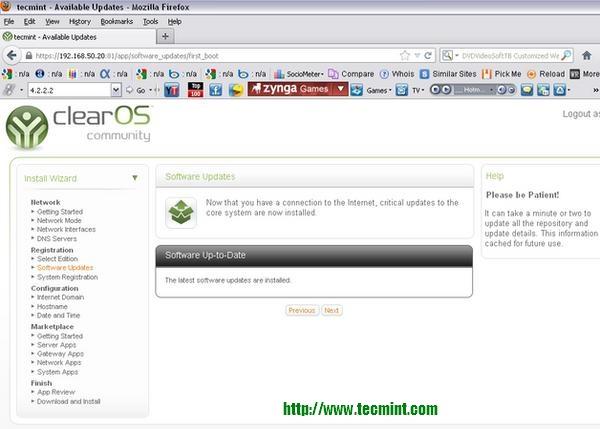
ClearOS 6.3 Updates


Any Query in ClearOS --Please contact my mail ID : jayendra1986@gmail.com
Thanks 

Monday, August 5, 2013

SQL Server Log Shipping in 2008

Problem

Setting up Log Shipping for SQL Server is not that difficult, but having a step by step process is helpful if this is the first time you have setup Log Shipping. In this tip we walk through the steps to setup Log Shipping.

Solution

Log Shipping is a basic level SQL Server high-availability technology that is part of SQL Server. It is an automated backup/restore process that allows you to create another copy of your database for failover.
Log shipping involves copying a database backup and subsequent transaction log backups from the primary (source) server and restoring the database and transaction log backups on one or more secondary (Stand By / Destination) servers. The Target Database is in a standby or no-recovery mode on the secondary server(s) which allows subsequent transaction logs to be backed up on the primary and shipped (or copied) to the secondary servers and then applied (restored) there.

Permissions

To setup a log-shipping you must have sysadmin rights on the server.

Minimum Requirements

  1. SQL Server 2005 or later
  2. Standard, Workgroup or Enterprise editions must be installed on all server instances involved in log shipping.
  3. The servers involved in log shipping should have the same case sensitivity settings.
  4. The database must use the full recovery or bulk-logged recovery model
  5. A shared folder for copying T-Log backup files
  6. SQL Server Agent Service must be configured properly
In addition, you should use the same version of SQL Server on both ends. It is possible to Log Ship from SQL 2005 to SQL 2008, but you can not do it the opposite way. Also, since Log Shipping will be primarly used for failover if you have the same versions on each end and there is a need to failover you at least know you are running the same version of SQL Server.

Steps to Configure Log-Shipping:

1. Make sure your database is in full or bulk-logged recovery model. You can change the database recovery model using the below query. You can check the database recovery model by querying sys.databases 
SELECT name, recovery_model_desc FROM sys.databases WHERE name = 'jugal'

USE [master]
GO
ALTER DATABASE [jugal] SET RECOVERY FULL WITH NO_WAIT
GO
2. On the primary server, right click on the database in SSMS and select Properties. Then select the Transaction Log Shipping Page. Check the "Enable this as primary database in a log shipping configuration" check box.
3. The next step is to configure and schedule a transaction log backup. Click on Backup Settings… to do this.
right click on the database in ssms
If you are creating backups on a network share enter the network path or for the local machine you can specify the local folder path. The backup compression feature was introduced in SQL Server 2008 Enterprise edition. While configuring log shipping, we can control the backup compression behavior of log backups by specifying the compression option. When this step is completed it will create the backup job on the Primary Server.
transaction log backup settings in ssms
4. In this step we will configure the secondary instance and database. Click on the Add… button to configure the Secondary Server instance and database. You can add multiple servers if you want to setup one to many server log-shipping.
add a secondary server
When you click the Add… button it will take you to the below screen where you have to configure the Secondary Server and database. Click on the Connect… button to connect to the secondary server. Once you connect to the secondary server you can access the three tabs as shown below.

Initialize Secondary Database tab

In this step you can specify how to create the data on the secondary server. You have three options: create a backup and restore it, use an existing backup and restore or do nothing because you have manually restored the database and have put it into the correct state to receive additional backups.
intialize secondary database

Copy Files Tab

In this tab you have to specify the path of the Destination Shared Folder where the Log Shipping Copy job will copy the T-Log backup files. This step will create the Copy job on the secondary server.
specify where the log shipping copy job will copy the t-log backup files

Restore Transaction Log Tab

Here you have to specify the database restoring state information and restore schedule. This will create the restore job on the secondary server.
create the restore on the secondary server
5. In this step we will configure Log Shipping Monitoring which will notify us in case of any failure. Please note Log Shipping monitoring configuration is optional.
log shipping monitoring will notify us in case of any faulures
Click on Settings… button which will take you to the “Log Shipping Monitor Settings” screen. Click on Connect …button to setup a monitor server. Monitoring can be done from the source server, target server or a separate SQL Server instance. We can configure alerts on source / destination server if respective jobs fail. Lastly we can also configure how long job history records are retained in the MSDB database. Please note that you cannot add a monitor instance once log shipping is configured.
monitoring can be done from the source server, target server or a separate SQL Server instance.
6. Click on the OK button to finish the Log Shipping configuration and it will show you the below screen.

Tuesday, July 30, 2013

Making a Firewall in CentOs 6.3

First of all install centos 6.3 after install webmin module....
If you are using the RPM version of Webmin, first download the file from the downloads page , or run the command :wget http://prdownloads.sourceforge.net/webadmin/webmin-1.630-1.noarch.rpmand then run the command :rpm -U webmin-1.630-1.noarch.rpmThe rest of the install will be done automatically to the directory /usr/libexec/webmin, the administration username set to root and the password to your current root password. You should now be able to login to Webmin at the URL http://localhost:10000/. Or if accessing it remotely, replace localhost with your system's IP address.
If you want to connect from a remote server and your system has a firewall installed, seethis page for instructions on how to open up port 10000.

CentOS 6.3 Installation Guide

CentOS 6.3 Step by Step Graphical Installation Guide

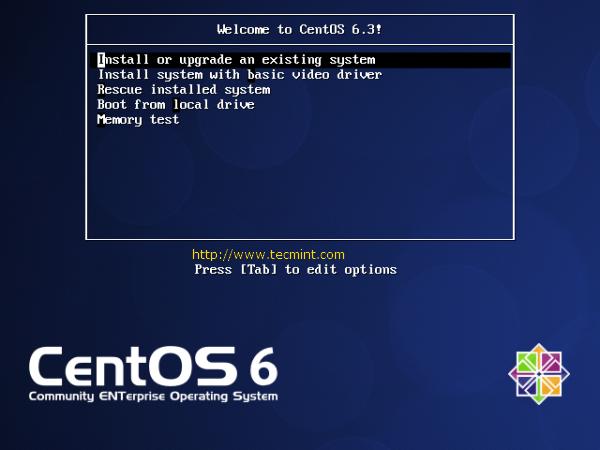
Boot Computer with CentOS 6.3 OS Installation CD/DVD.

1. Select Install or Upgrade existing system options.
Select Install or Upgrade
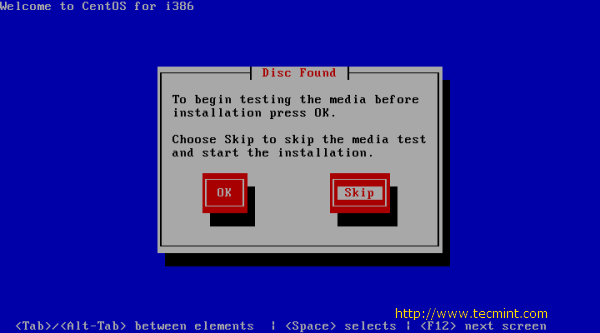
2. Choose skip media test as it may take long time to check media.
Skip CentOS 6.3 Media Test
3. CentOS 6.3 Welcome Screen press Next.
CentOS 6.3 Welcome Screen
4. Language Selection.
CentOS 6.3 Language Selection
5. Select appropriate Keyboard.
CentOS 6.3 Keyboard Selection
6. Select Basic Storage Device if your hard drive is attached locally.
CentOS 6.3 Storage Device Selection
7. You may get Storage Device warning, you can click Yes, discard any data button toContinue.
CentOS 6.3 Storage Device Warning
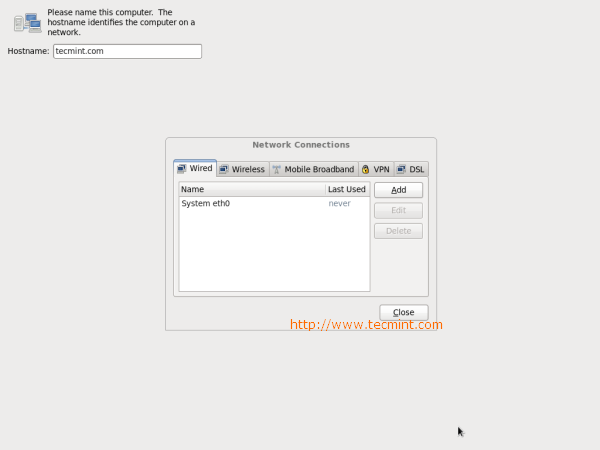
8. Give a Hostname to the server and click on Configure Network button if you want to configure network while installation.
CentOS 6.3 Hostname and Network Setup
9. Click Wired tab and click on Add button.
CentOS 6.3 Network Setup
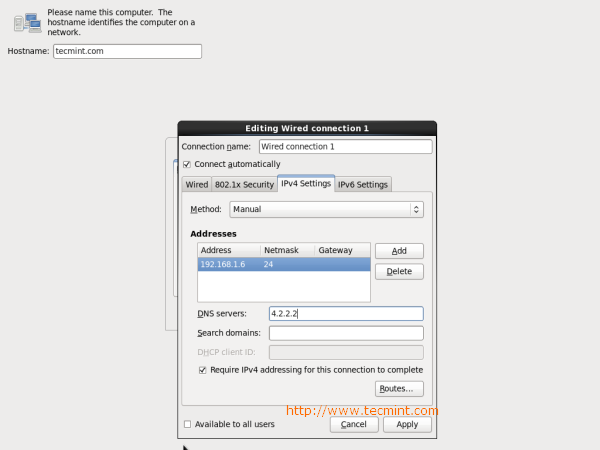
10. Select Connect Automatically, go to ipv4 settings tab and select Method and selectManual in drop down. Click on Add tab to fill address box with IP Address, Netmask,Gateway and DNS Server. Here I’m using IP Address 192.168.1.6 and DNS Server is 4.2.2.2 for demo. This IP Address may vary in your environment.
CentOS 6.3 Network Configuration
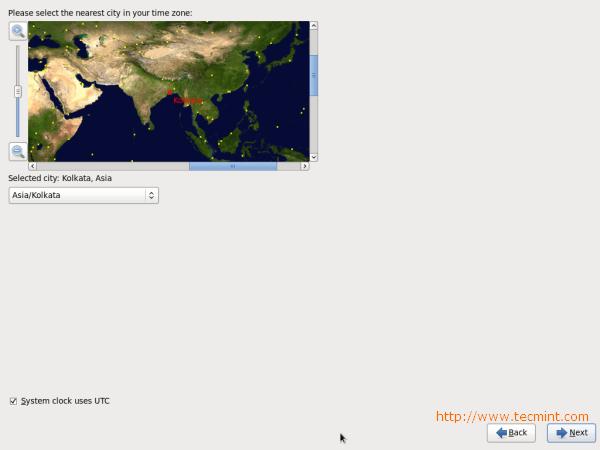
11. Select Time Zone.
CentOS 6.3 Set Timezone
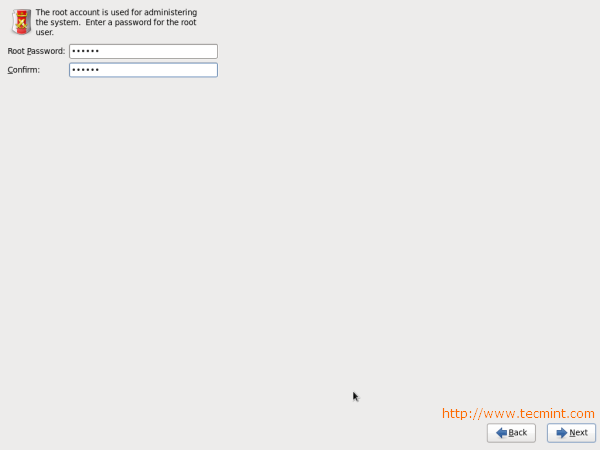
12. Give a root password.
CentOS 6.3 root Password
13. Select appropriate partitioning as per your requirement.
CentOS 6.3 Partition Selection
14. Verify filesystem. Here, you can edit filesystem If you want.
CentOS 6.3 Partition Verify
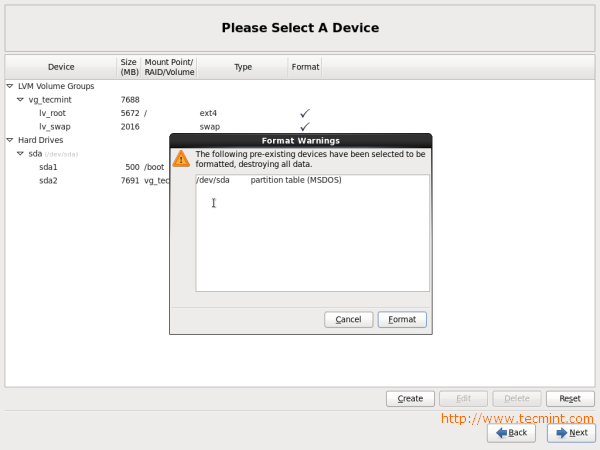
15. Disk Format Warning, click on Format.
CentOS 6.3 Disk Format
16. Select Write Changes to disk.
CentOS 6.3 Disk Changes
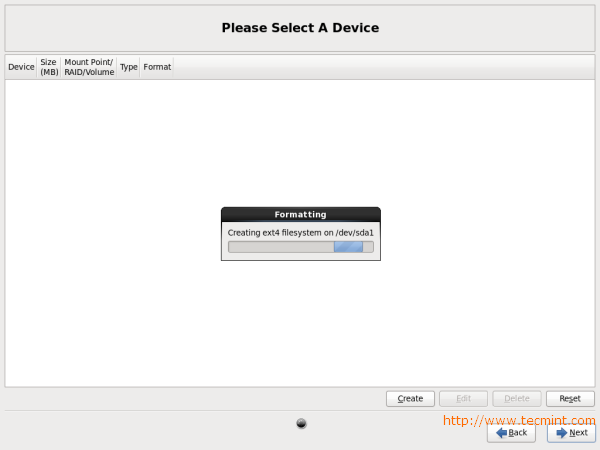
17. Hard Drive is Formatting.
CentOS 6.3 Disk Formatting
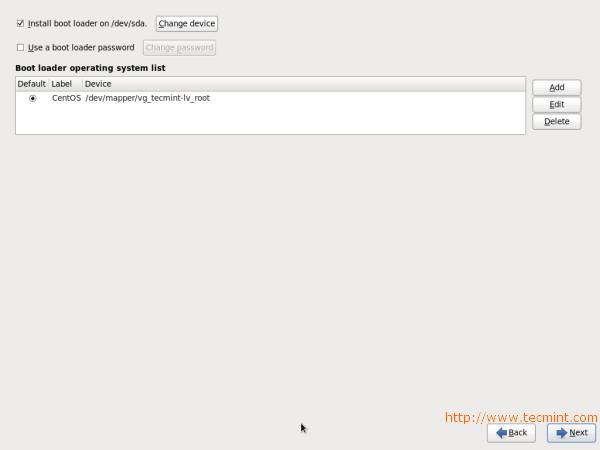
18. Here, you can give Boot loader Password for better security.
CentOS 6.3 Boot Loader Password
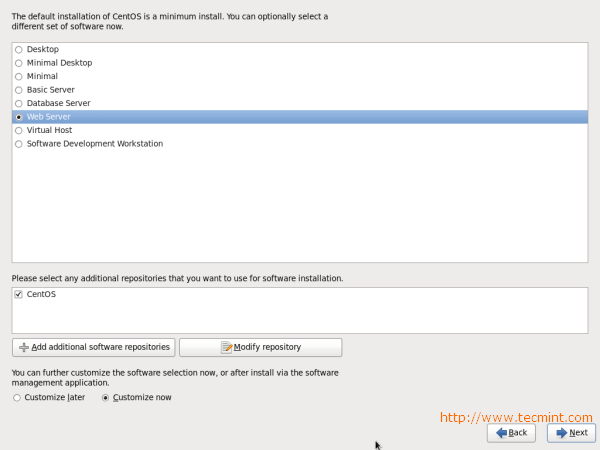
19. Select the applications you want to install, you can choose Customize now and click Next.
CentOS 6.3 Package Selection
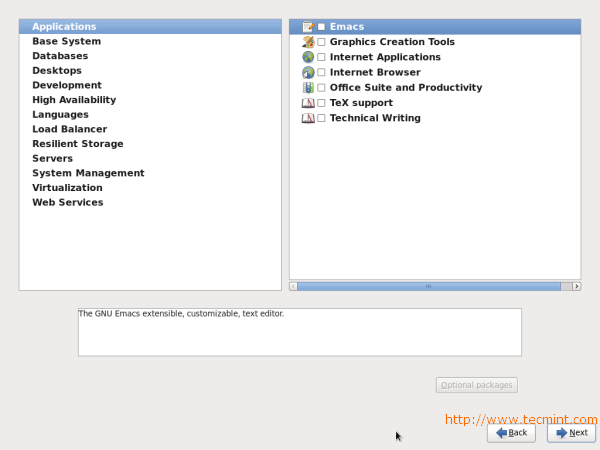
20. Select the applications you want to install and click Next.
CentOS 6.3 Packages Selection
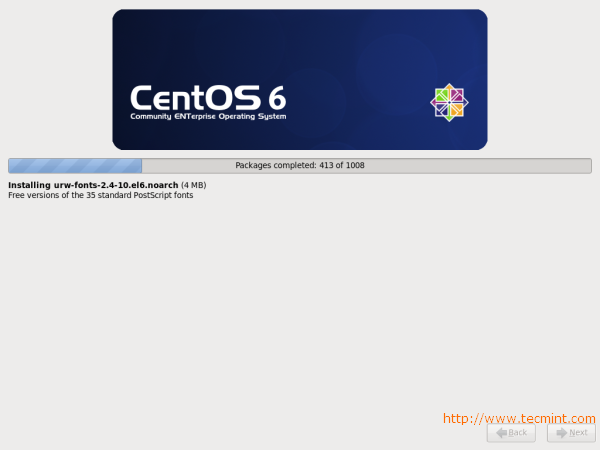
21. Installation started, this may take several minutes as per selection of packages.
CentOS 6.3 Installation
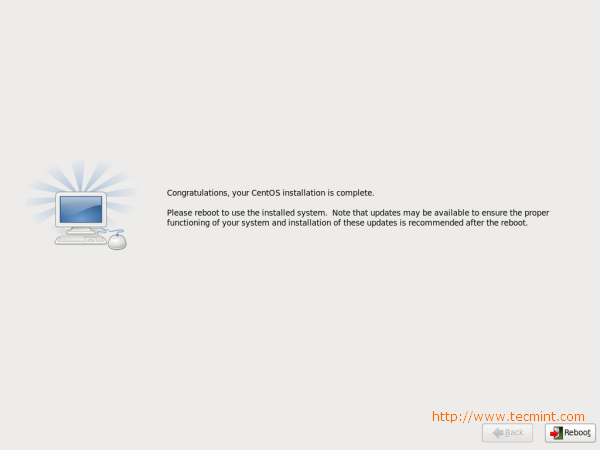
22. Installation completed, Please remove CD/DVD and reboot system.
CentOS 6.3 Installation Completes
23. Welcome to CentOS 6.3 Login Screen.
CentOS 6.3 Login Screen
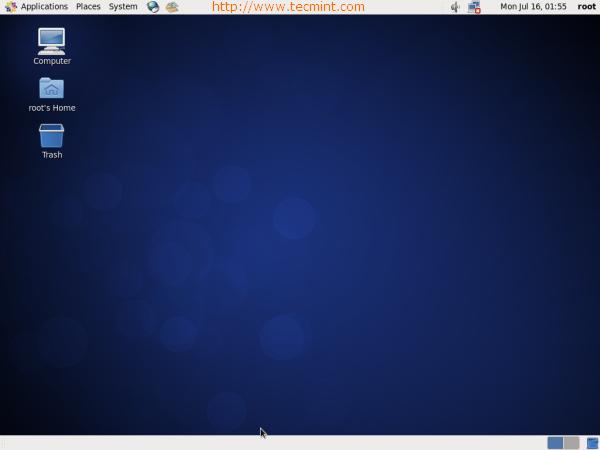
24. CentOS 6.3 Desktop Screen.
CentOS 6.3 Desktop Screen

Ncomputing Thin Client

N computing Related Any Issue Please email on  : jayendra1986@gmail.com